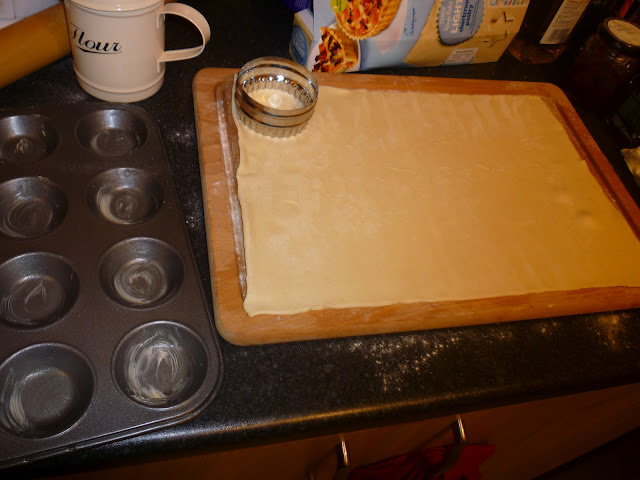
I was going to wait until tomorrow to post this, but I got far too excited and decided to do it tonight instead! Here is the recipe for my Cheat's Jam Tarts!
This is probably the easiest jam tart recipe there is. My Mum came up earlier in the week, and taught me how to make a really simple version of these. If you're not usually a baker, or, like me, don't have much patience to make perfect pastry, trust me, this recipe is going to be great for you!
What you Need:
- Oven pre-heated to Gas Mark 7 (218 degrees Celsius, 425 degrees Fahrenheit)
- Pastry board
- Tart tin
- 8cm cookie cutter
- Plain flour (for dusting)
- Rolling pin (just in case)
- Ready roll pastry (I used shortcrust)
- Butter and paper towel for greasing
- Jam (any flavour)
- Milk and a pastry brush
Dust your pastry board with a generous amount of flour and roll out your pastry. I always like to make sure both sides of the pastry are floured just in case they decide to get sweaty and stick/ Grease your tart tin with a little butter on a paper towel to stop the pastry sticking.
Using an 8cm cutter, cut discs in your pastry and lay them in to your tart tin. I used a 375g box of pastry, and that happily made 12 pastry bases with some pastry left over. If you're careful with your cutting, you should have pastry to save to make more jam tarts! Yippee!!
Step Three
Pick your jam. Any jam you like. I'm lucky enough to have a fridge full of homemade jam that I was given as a present, but you could use any kind you want to. Fill your pastry bases. I used a heaped teaspoon for mine and spread the jam out. Now, this bit is very important...DO NOT USE TOO MUCH JAM! If you do, you will end up with an oven that looks like it has picked a fight with your best preserves! Be cautious. It's better to use too little jam, and learn, than too much and spend your evening cleaning your oven!
Fold the edges of the pastry in towards the jam to seal the two components together. It might not look pretty (mine as an example), but the joy of home baking is that it is made with love, and joy. Of course, if you have the patience to fiddle with the pastry to get it perfect, that's ok. I applaud you if you do.
Step Four
Using a little bit of milk (and I mean teenie tiny), brush the edges of your tarts LIGHTLY. This will help turn the pastry lovely and golden brown. Don't use too much - I can't emphasise this enough. 8cm cutters make dainty tarts, so if you use too much, you're likely to end up with a milky jam tart...this will not be so good!
Step Five
Put your tarts in the oven. They need to cook for 15 minutes. I set my timer for 7 minutes, and then turn the tin and cook on the other side for the last 8 minutes. That's because my oven is quite old, and really likes to cook things more on one side. You all know your ovens, so adjust and adapt your cooking method accordingly. Remember the temperature you need - Gas Mark 7. (That's 218 degrees Celsius, and 435 degrees Fahrenheit by the way.)
After 15 minutes, take your tarts out of the oven and allow to cool. I let mine cool for about 15 minutes. This gave time for the pastry to cool down and the jam to set. They also slid out beautifully because of the butter I used to grease the tin.
If you have leftover pastry, wrap it up in cling film, or a food bag, and pop it back in the fridge. It should last another day or two so you can use it again to make more yummy baked goods!
Step Six
Enjoy your jam tarts!
I can thoroughly recommend them with a mug of tea/coffee and a girly film.
Maybe if you're kind enough you'll want to share your jam tarts...
But I wouldn't!
Happy Baking!


Yummy. Love jam tarts!!:-D
ReplyDeleteThey are amazing! And last for quite a while too. My Grandma used to make them with apricot jam because it was cheaprr...I'm going to get my hands on some lemon curd too for a fruity shake up...apricot and lemon make good Spring flavours!
Delete